!The Cosmik Streamer console, Flight View
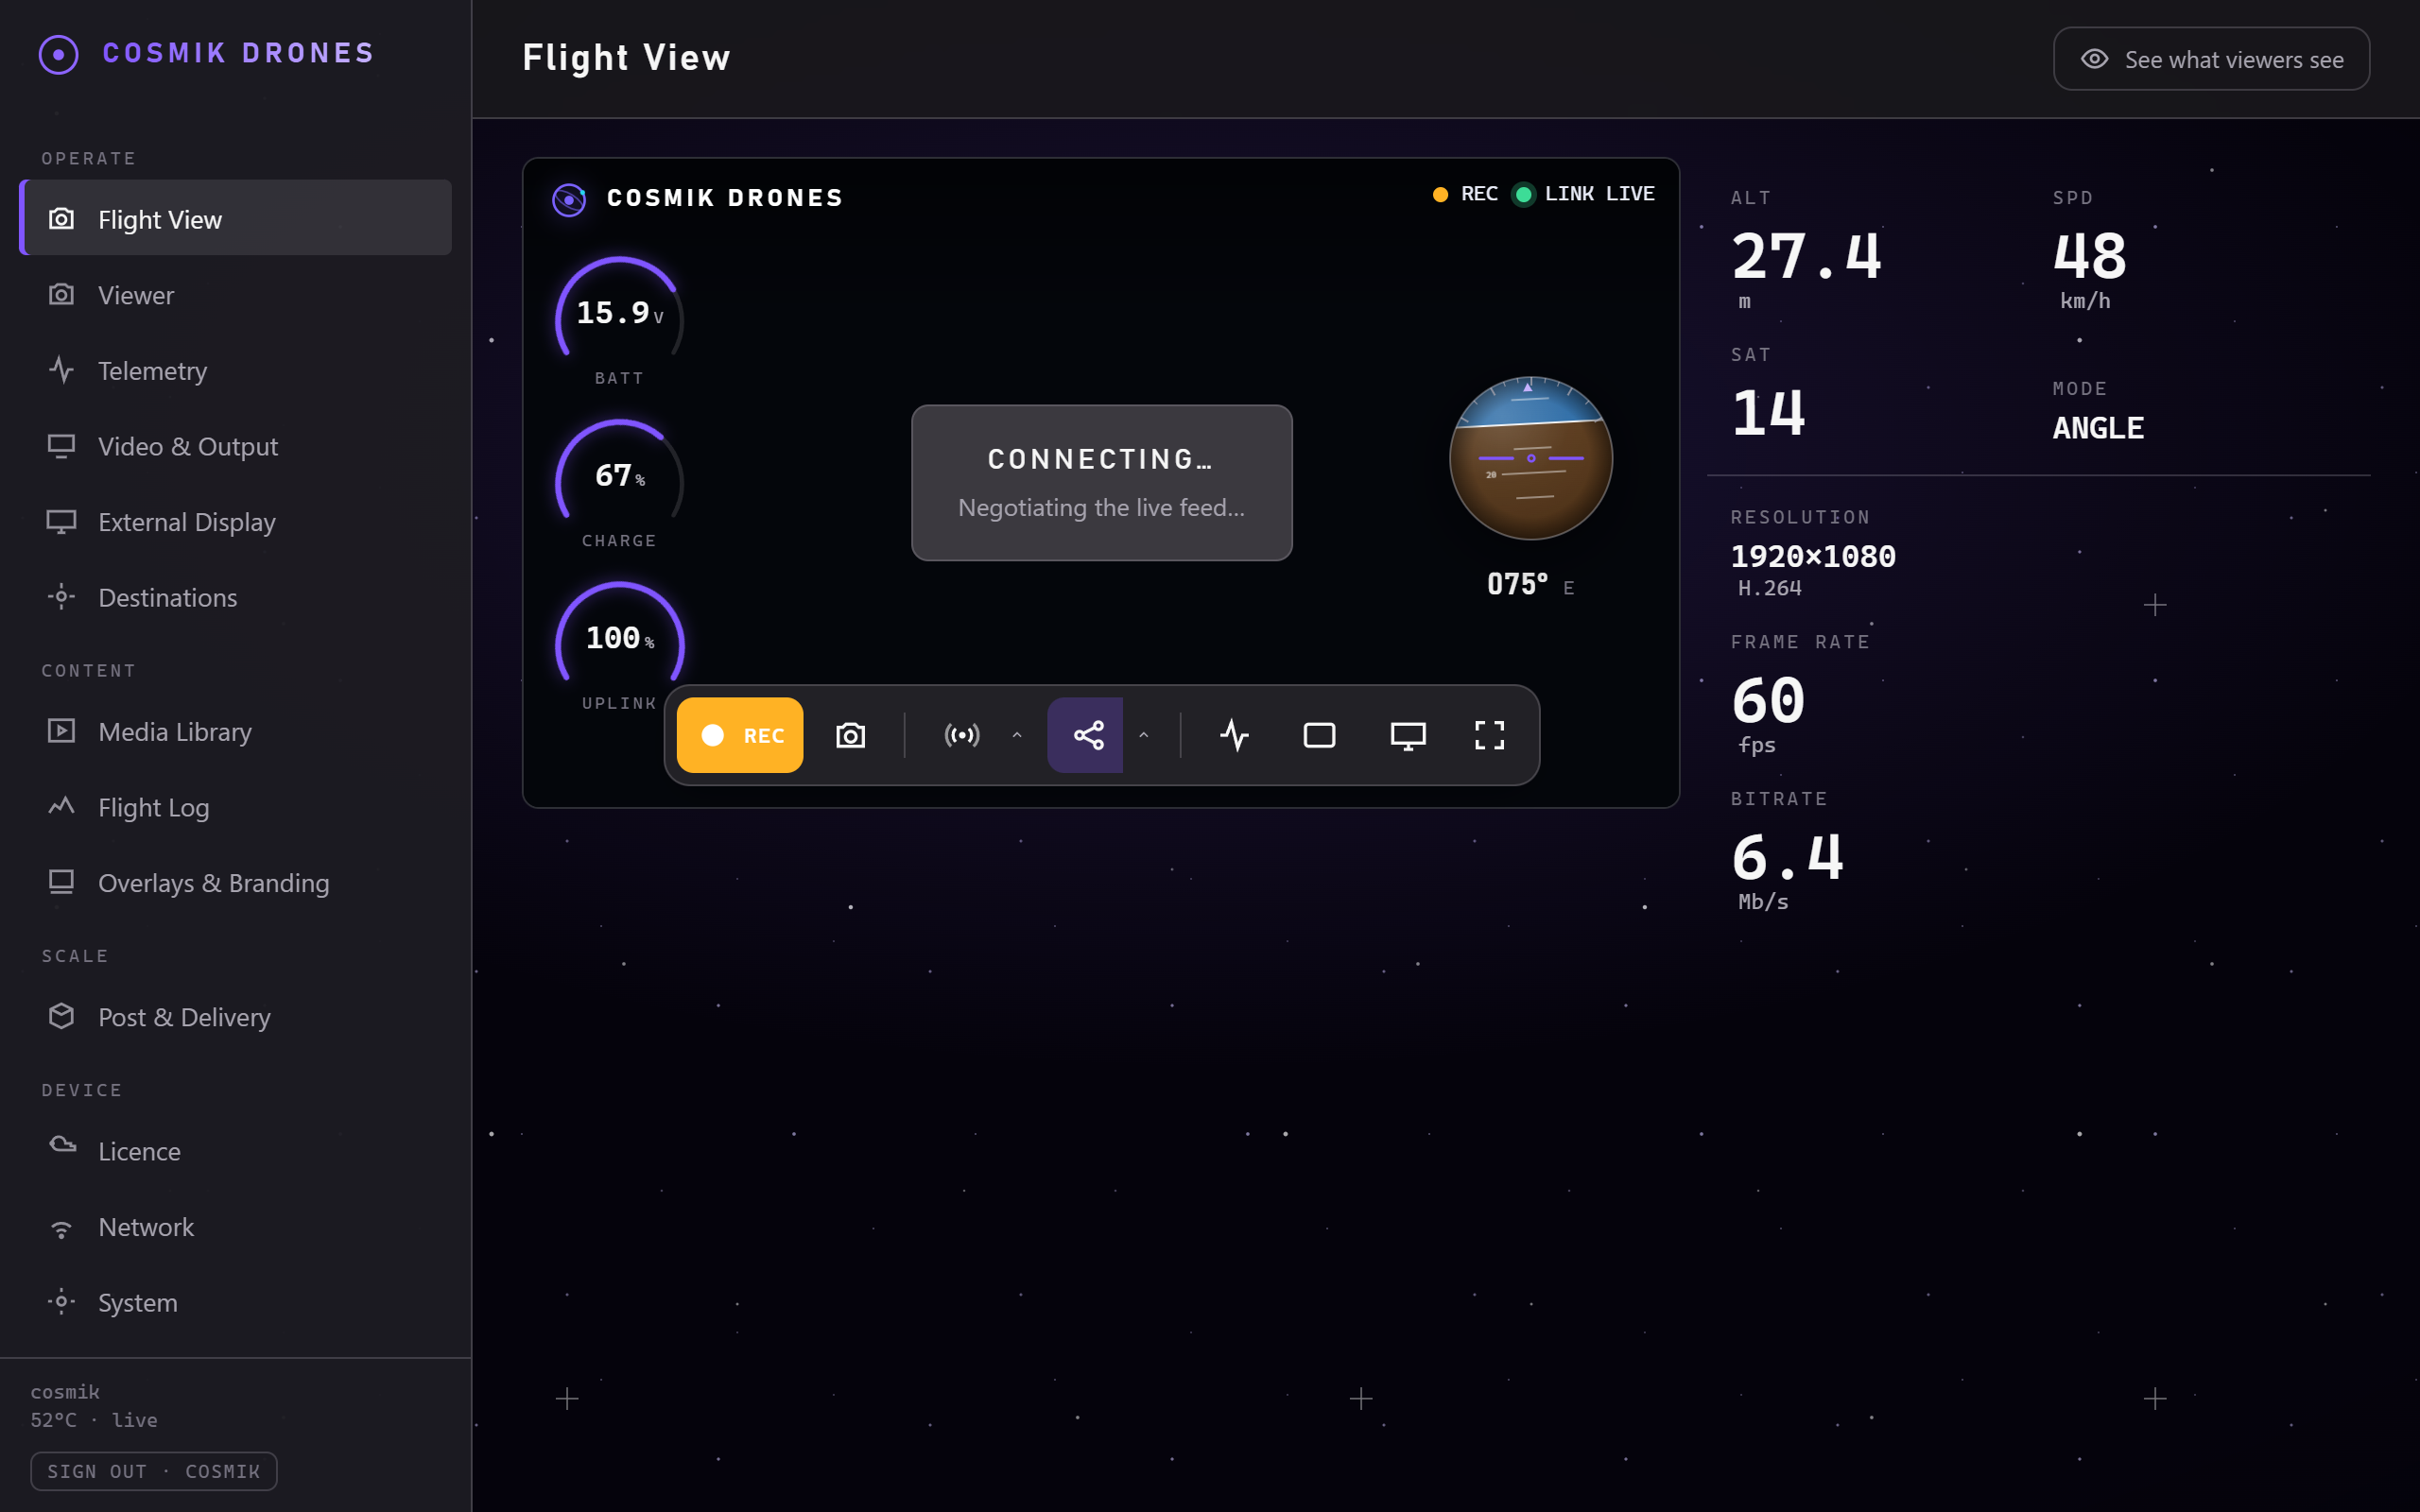
The console, open at Flight View. You reach this from any phone, tablet or laptop joined to the Streamer, in a browser - there is nothing to install.
Welcome to Cosmik Streamer.
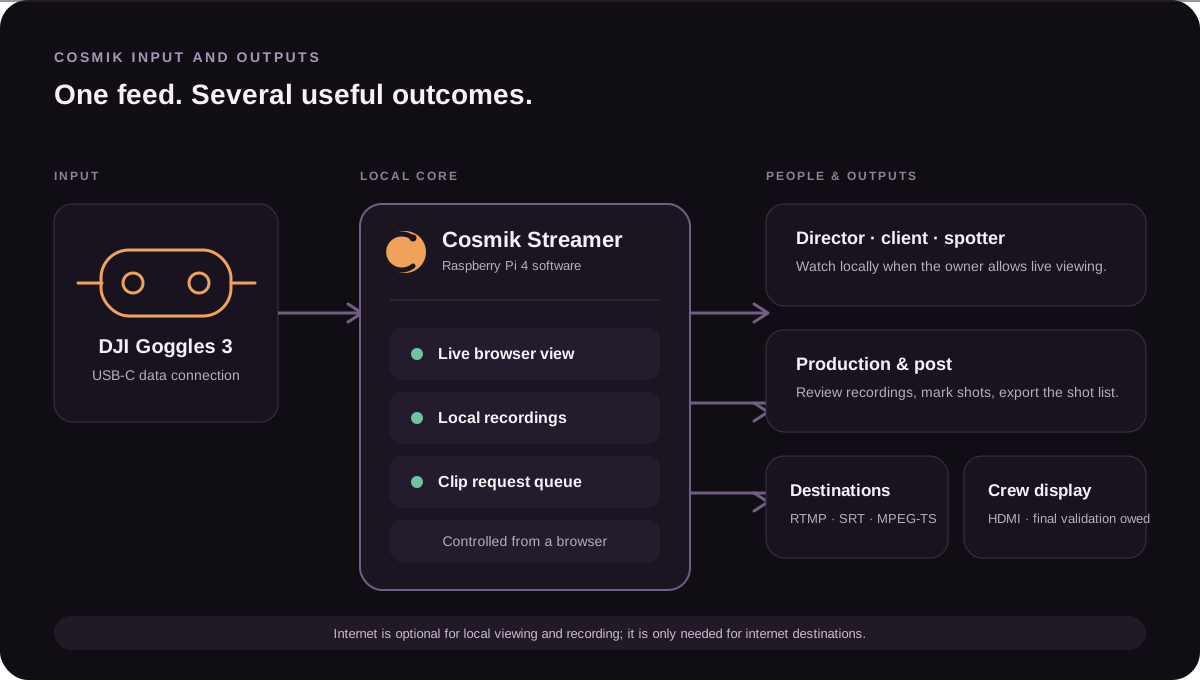
Cosmik Streamer is software for a customer-built Raspberry Pi 4B. It takes the supported DJI goggles feed and makes it available to browsers, recordings, production tools, an optional local display, and configured streaming destinations.
What you buy is the software. You supply the Raspberry Pi, memory card, cables, and power hardware. The customer image is not published yet.
It also records flights and gives the signed-in operator a visual timeline for marking the shots a client or production team asks for.
Everyday use is browser-led. The one-time hardware build and card preparation are documented separately.
What it does, in plain terms
| Shows your flight live | Anyone on the local network opens a web page and watches the low-delay feed. No public latency number is claimed before release measurement. |
|---|---|
| Streams to the world | Push the same flight to YouTube, Facebook, Twitch, or a client's own system. |
| Records everything | With auto-record enabled, a recording starts when the feed arrives. The owner can browse, download, or deliberately delete it later. |
| Makes a "broadcast" version | Fly in one shape, broadcast in another — with your logo, a name bar, and a timecode burned in. Your own view stays untouched. |
| Shows your signal | See how strong your control link is, live. |
| Takes clip requests | The signed-in operator marks exact moments and keeps a production request queue. A separate guest review link is not built. |
| Works as a camera in OBS | Use the verified browser-source route in OBS or vMix without inventing a latency figure. |
| Drives a screen directly | The HDMI player, standby media, monitor identity, and framing controls exist; the final live-picture branch remains in Validation. |
There is no sound. DJI's air unit carries no audio, so the picture is silent — on your viewers' screens, in your recordings, and on YouTube. Streaming platforms that insist on an audio track are given a silent one automatically, so they accept the stream normally.
Guide contents
Start here
- Hardware and installation — the parts, connections, card, and browser address
- Getting Started — what you need, and setting it up the first time
- Powering the Streamer — ⚡ read this before your first flight
Writing the card image. The step-by-step for putting Cosmik Streamer onto your microSD card is in the Hardware and installation guide at cosmikstreamer.com/docs. Getting Started below begins from a card that is already made.
Everyday use
- The Live View — the main screen, recording, and fullscreen
- Sharing the Live View — letting clients and guests watch, safely
- Media & Clip Requests — recordings, the rolling ten-minute buffer, playback, and client shot lists
- The Flight Log — how your signal held up, flight by flight
Setting things up
- Activating Your Licence — licence key, first-device binding, and offline activation
- Streaming to Others — sharing your flight and going live to YouTube etc.
- Video & Output — the broadcast version of your feed, and an HDMI screen
- Camera — brightness, contrast and colour on everything you send out
- Logo & Overlays — putting your branding on the broadcast
- Signal & Telemetry — seeing your control-link strength
- Putting the Streamer on Your Own Wi-Fi — joining your house or a venue's network, and the one thing it costs you
- OBS & Production Tools — using the flight as a camera in OBS or vMix
- Software Updates — checking for new software, and what the Streamer will never do to you while you are flying
If something goes wrong
- Troubleshooting — common problems and fixes
- Glossary — plain-English explanations of the technical words
What you need
A DJI FPV setup — an O3 Air Unit or O4 Air Unit Pro on the drone, with DJI Goggles 3.
Verified goggles scope: DJI Goggles 3 is the only model currently supported by physical evidence. Goggles 2, Integra, and N3 are not marketed as compatible until each model is tested.- A Raspberry Pi 4B, and a microSD card to put the Cosmik Streamer image on. The card image is built for the Pi 4B specifically. This isn't a preference: getting video out of DJI goggles over USB needs a board that can pretend to be a USB device, and an ordinary Windows or Mac computer cannot do it — we tested that directly.
- A suitable power supply. This one matters more than people expect, so it has its own page. Read it before you buy one.
- A USB-C cable to connect the goggles to the box — a proper data cable, not a charge-only one.
- Something to watch on — a phone, tablet, or laptop with a web browser.
Optional: an HDMI monitor or TV if you want the flight on a screen at the venue, and an ExpressLRS radio if you want live signal readings (Signal & Telemetry).
Once the card is made, there is nothing to install on your phone or laptop — everything is a web page.
A quick word on how it's organised
Cosmik Streamer has two separate doors, and which one you get depends on the address you open:
- The visitor view — the plain address on its own. Full-screen video and nothing else. This is what clients and guests get, so there's nothing for them to change.
- The console — the same address with
/consoleon the end, protected by your password. Recording, streaming, settings, everything.
See Sharing the Live View for how to hand the feed to a client.
Everything you change is saved automatically. There's no "save" button to remember.
A note on "Coming soon" labels Cosmik Streamer is actively being developed. Where a feature is not finished, this guide says so plainly. Newer code can also carry a Validation note when it exists and is tested but still needs its named physical-device check.
Source: /docs/README.md