Overlays & Branding. Your logo and overlays are placed here, and they never touch the picture you fly on.
This is where you put your name on your work — your logo, a name bar, and a running timecode, burned permanently into the broadcast picture.
Everything on this page affects the broadcast version only. Your own view in the goggles and the fast pilot feed always stay completely clean. You will never have a logo floating in your face while flying, and none of this is in your recordings.
Your branding does reach YouTube, Facebook, Twitch and your other destinations. Each destination on the Destinations page sends either the branded broadcast version or the plain pilot feed, and new destinations send the branded version. You do not have to switch anything else on: the moment you add a logo, name bar or timecode here, the broadcast version starts by itself for any destination that needs it. Set a destination to Pilot feed when a client wants a clean picture or the very lowest delay.
Before you start: the Broadcast overlays card at the top of the page has its own broadcast switch and — while the broadcast is running — a small live snapshot of the actual broadcast picture, refreshed every few seconds. That snapshot is your proof: if your logo is burning in, you'll see it right there.
The switch keeps the broadcast version running all the time, which is what you want if a crew is pulling it over your own network. You do not need it for a branded destination: those start it on their own and the card says so when they have.
One thing on this page is different: the Splash screen below appears between flights, both on the public viewer page and on a monitor plugged into the Streamer. It is not burned into the broadcast. You upload it once and both screens use the same file. Your message goes over the picture on the viewer page only — a monitor plugged into the Streamer shows the picture on its own.
Splash screen (what viewers see between flights)
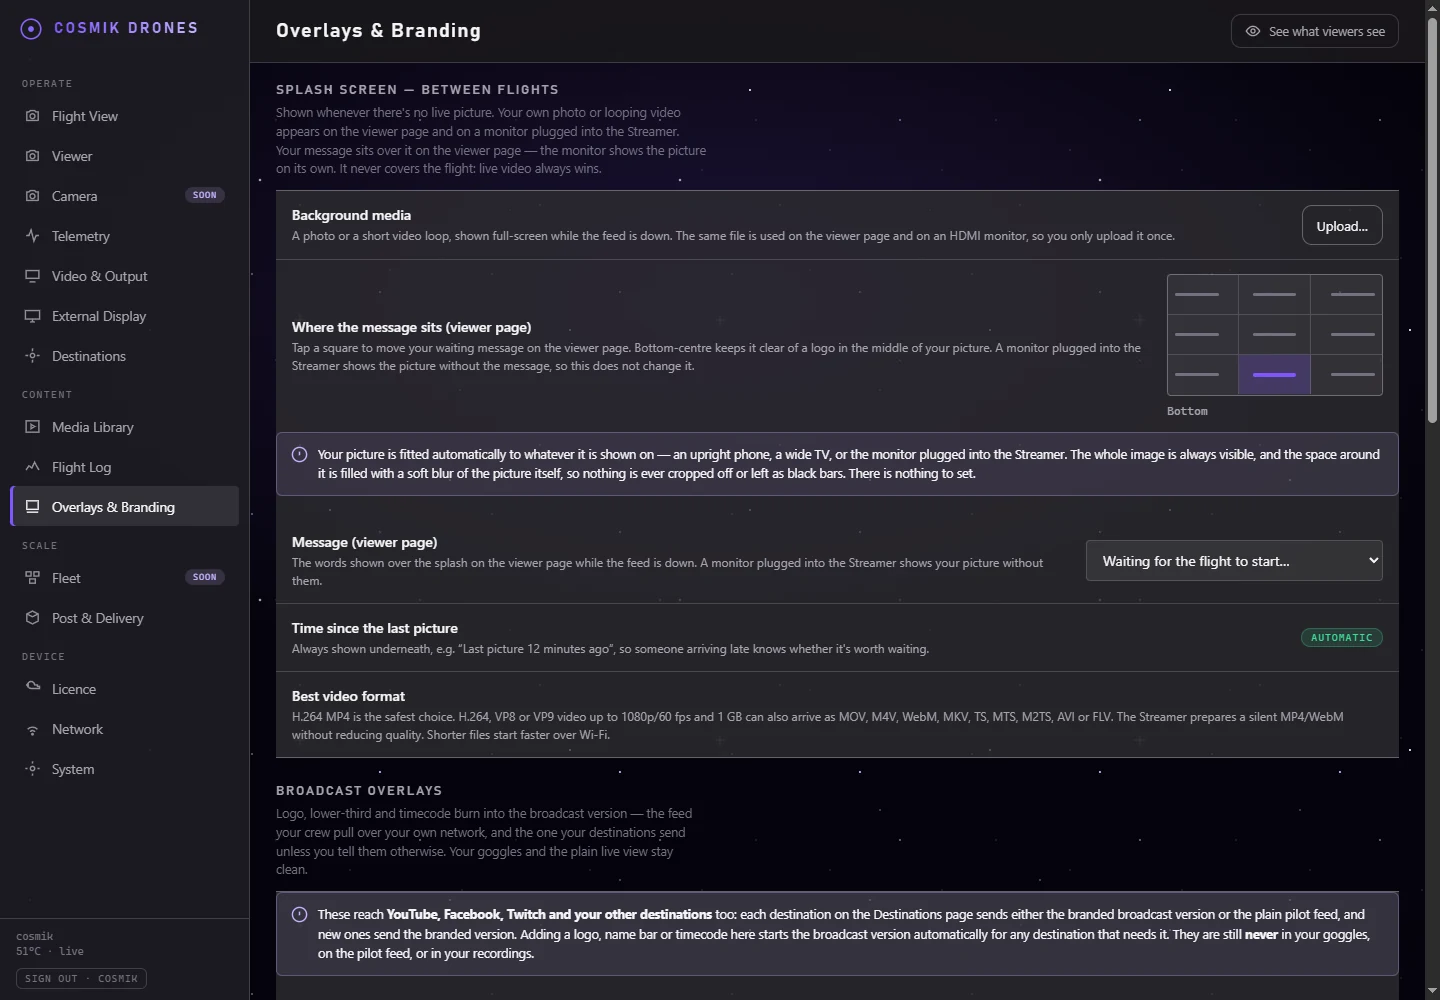
When there's no live picture — you're swapping batteries, setting up, or wrapping up — anyone watching the viewer link, plus the HDMI monitor, sees a waiting screen. You can put your own picture or a short video behind it, with your message over the top.
Where the message appears. Your picture or video goes to both screens. Your message and its placement are drawn by the viewer page only — the HDMI monitor shows your picture or video on its own. If you have not uploaded anything, the monitor falls back to a plain Cosmik card that reads "Waiting for the flight to start"; that fixed wording is not your message and does not change with it. Putting your own words on the monitor is on the Coming soon list below.
Adding your picture or video
- Go to Overlays & Branding in the Console.
- Under Splash screen — between flights, next to Background media, press Upload…
- Choose a photo or a video.
You'll see a small preview, and viewers see it straight away the next time the feed is down. Press Replace… to change it, or Remove to go back to the plain waiting screen.
Placing your message
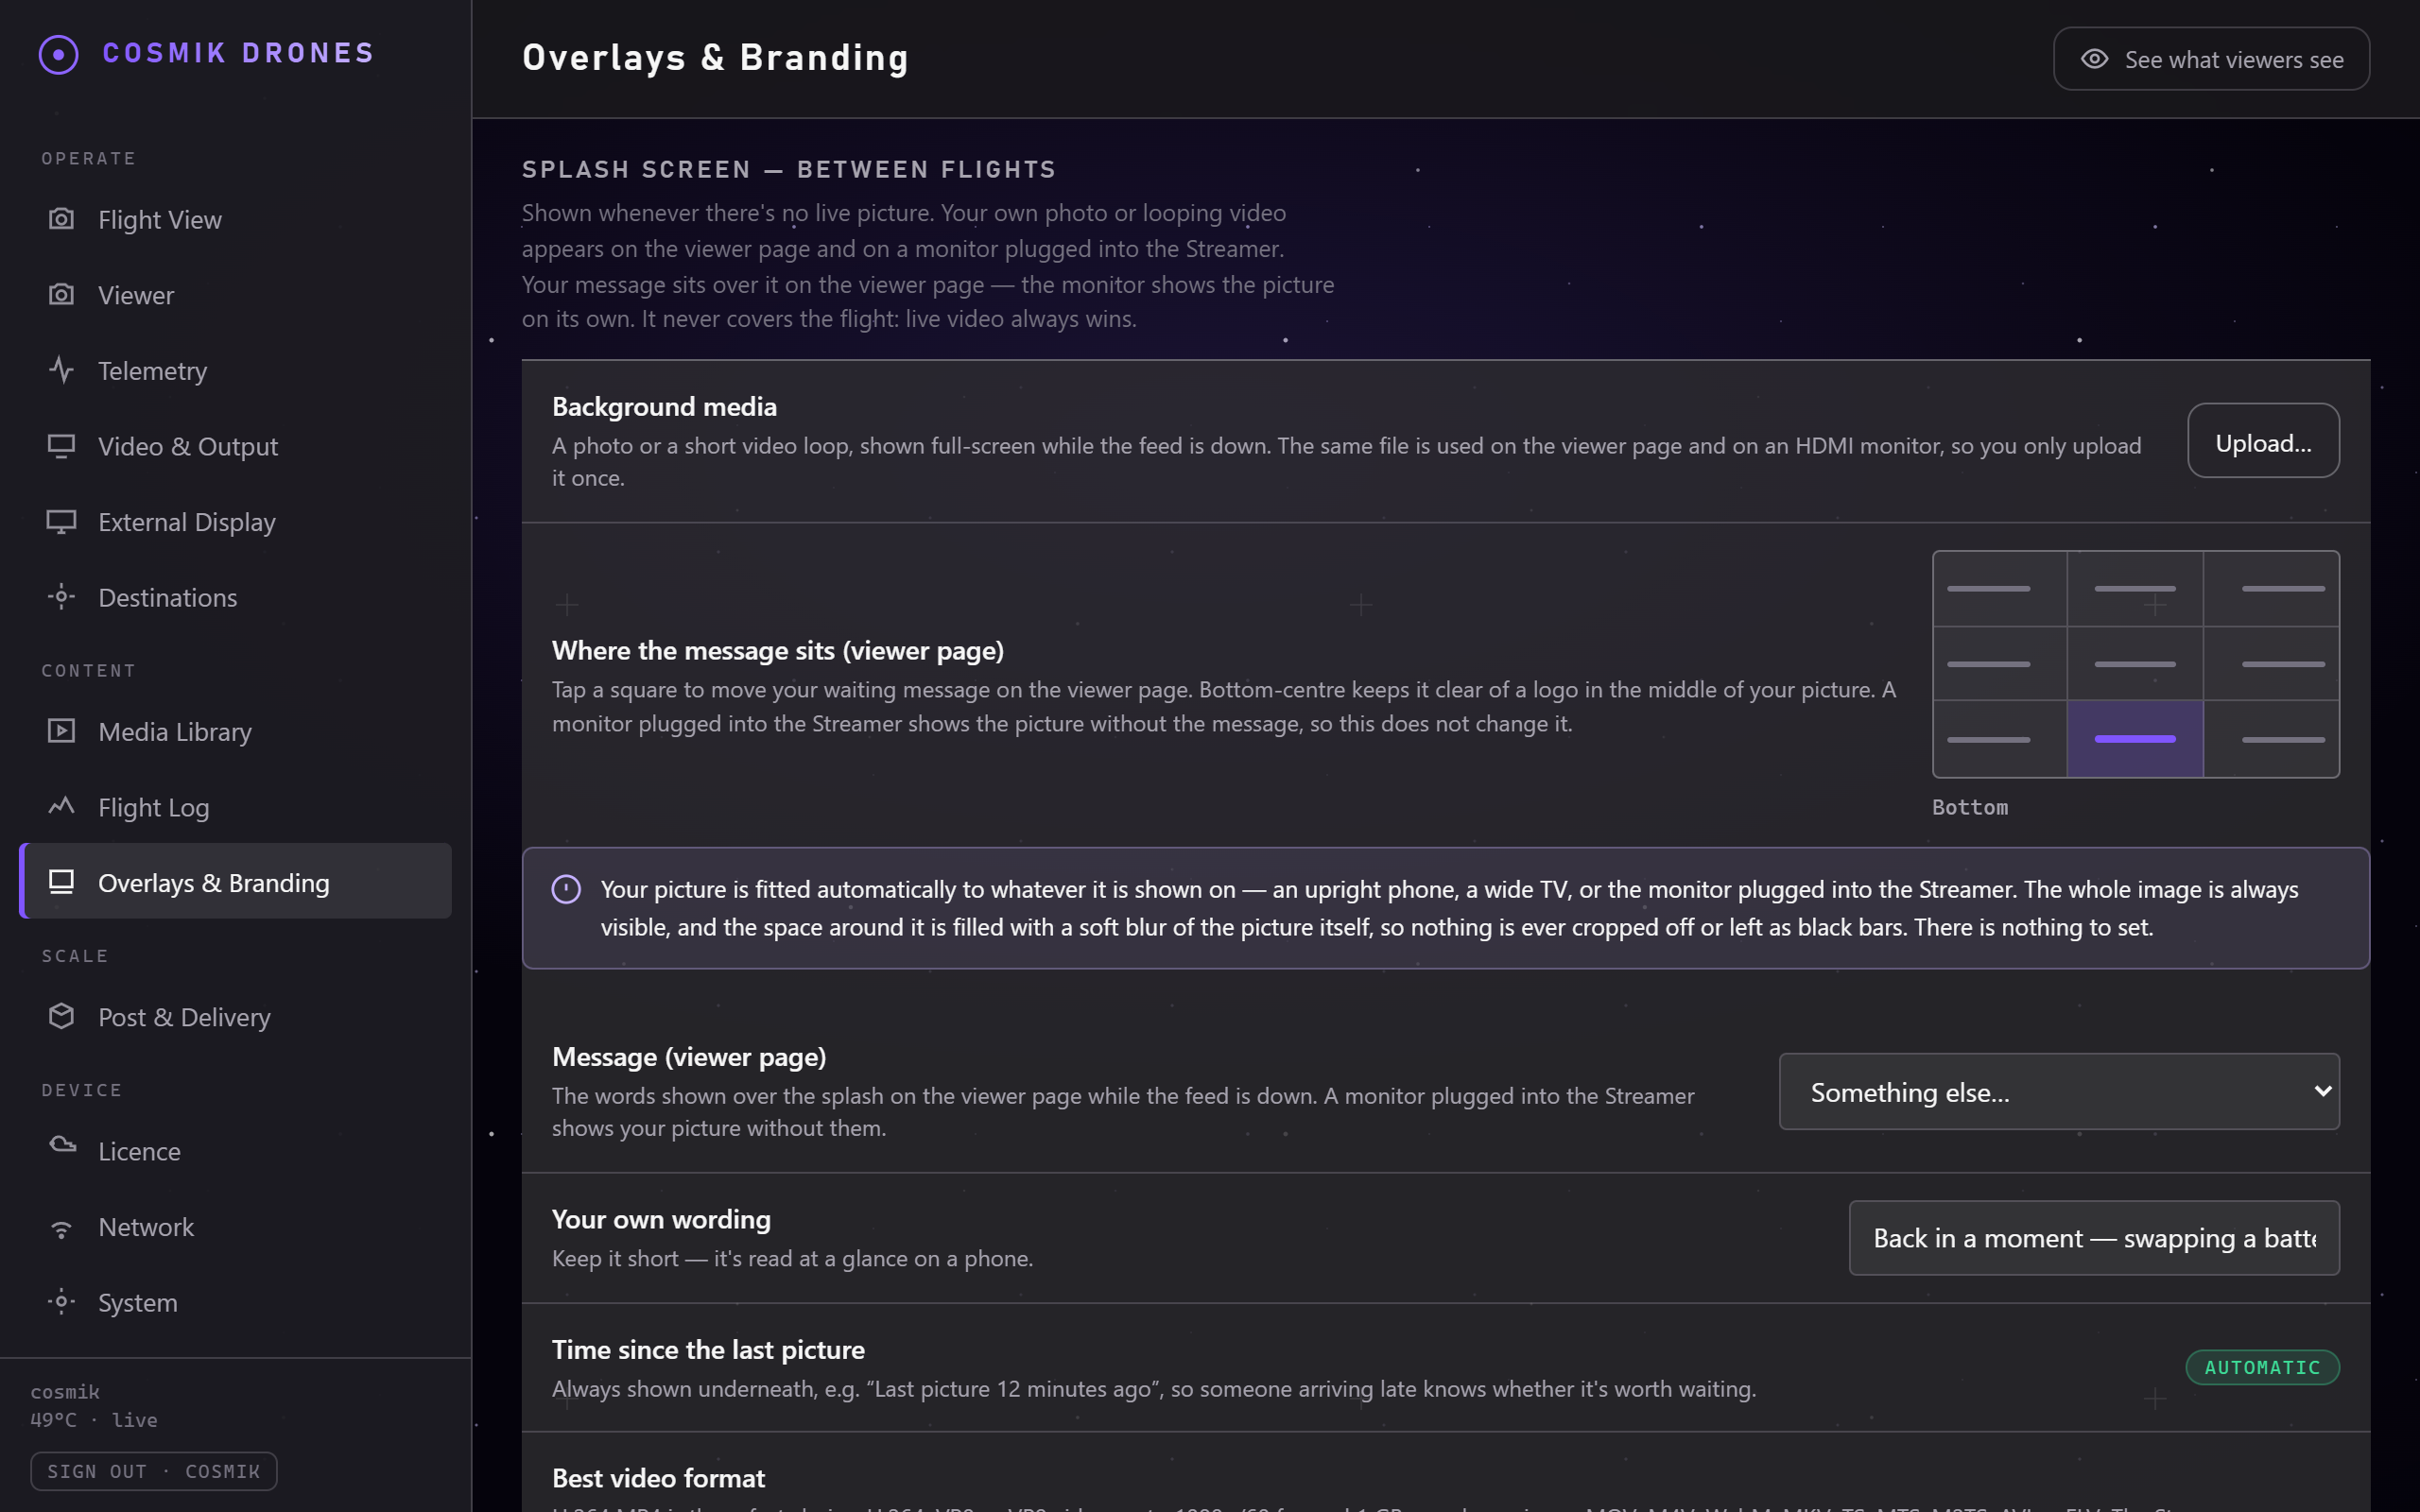
- Where the message sits (viewer page) — tap one of the nine squares to choose where your words sit on the viewer page: a corner, an edge, or the middle. It does not change the HDMI monitor, which shows your picture without the message.
- Picture fitting is automatic. The whole picture or video stays visible. A soft, dimmed copy fills any space around it, so upright phones and wide monitors both look intentional without a technical display setting.
- Message — pick one of the ready-made lines ("Swapping batteries — back in a moment") or choose Something else… and write your own. It changes on viewers' screens straight away.
- Time since the last picture is always shown underneath automatically, so someone arriving late knows whether it's worth waiting.
What kind of file works best
- Pictures: PNG, JPEG and WebP are accepted, up to 12 MB. Large pictures are automatically reduced to a sensible screen size so they load quickly over the Streamer's Wi-Fi.
- Videos — this matters: H.264 MP4 is the safest choice. H.264, VP8 or VP9 video up to 1080p, 60 fps and 1 GB is accepted from MP4, MOV, M4V, WebM, MKV, TS, MTS, M2TS, AVI and FLV containers. There is no separate duration limit. The Streamer quickly repackages the video into a silent MP4 or WebM without reducing its quality. Formats such as HEVC/H.265, AV1, 10-bit colour or 4K are rejected with an explanation because they cannot be promised to work on both phones and the HDMI monitor. Shorter files still upload and start faster over Wi-Fi.
- During a large upload, the button shows progress. After the bytes reach the Streamer it briefly says Processing while the file is checked. If the file cannot be used, the page states the actual reason; it does not mislabel a size or format problem as a connection failure.
Your picture or video is only ever shown while there's no live flight. The moment the feed comes back, it's replaced by the video — it never sits over the flight.
Your logo
Adding it
- Go to Overlays & Branding in the Console.
- Next to Logo image, press Upload…
- Choose your logo file.
It uploads, you'll see a small preview of it, and it appears on the broadcast picture within a few seconds. Press Replace… to change it later, or Remove to take it off.
What kind of file works best
- A PNG with a transparent background gives the most professional result — your logo sits on the video rather than in a rectangle.
- JPG and WebP also work, but a JPG will always show as a solid block.
- Any reasonable size is fine; it gets scaled to fit. A logo around 500–1000 pixels wide is plenty.
The single biggest quality difference is transparency. If your logo currently sits in a white box, ask your designer for a "PNG with transparent background" — it'll look far better.
Placing it
- Corner — pick which corner it sits in. Tap one of the four squares.
- Opacity — how solid it looks. Around 80–90% is a good balance: clearly visible, but not fighting the footage. Lower it for a subtle watermark.
- Size — how large, as a proportion of the picture. 10–15% suits most logos.
Changes apply within a few seconds. The broadcast picture briefly restarts as it updates — that's normal, and viewers just see a moment's pause.
The name bar (lower-third)
A name bar across the bottom-left — the sort of thing you see under an interviewee on TV. Good for the pilot's name, the client, or the event.
- Type what you want to appear into Pilot ID.
- Switch on Lower-third (pilot / event).
It appears in a semi-transparent panel so it stays readable over both bright sky and dark ground.
If Pilot ID is empty, the bar falls back to your product name.
Timecode
Switch on Burn-in timecode to show a running clock in the top-right, counting up from when the broadcast started, e.g. 00:04:37.500.
Why you'd want this: if a client is watching live and says "that bit at four minutes thirty" — you both have the exact same number to work from. It removes all ambiguity when they come back later asking for a shot.
Turn it off for a clean look when it isn't needed.
Display name
- Display name is the fallback text in the lower-third when Pilot ID is blank. It does not rename the app.
A suggested setup
For most client work:
| Setting | Suggestion |
|---|---|
| Logo | Transparent PNG, bottom-right, 85% opacity, 12% size |
| Lower-third | On, with the client or event name |
| Timecode | On while shooting, off for the final showreel |
Bottom-right keeps the logo clear of the sky (where a lot of the action is) and out of the way of the name bar on the left.
Coming soon
- A branded boot screen — branding from the moment the Streamer powers on, separate from the working between-flights splash described above.
- Your waiting message on the HDMI monitor. The picture and video already appear there; the message does not.
- A different logo per destination. Today every branded destination carries the same one.
- Goggles HUD support — the goggles' “Camera View Recording” setting may include the pilot HUD, but its USB-output behaviour is still being hardware-tested. Do not rely on it for a shoot yet.
- Telemetry burn-in — a styled signal/battery overlay on the broadcast picture only, leaving your recordings clean (unlike the goggles' HUD option above).
- Custom fonts and colours for the name bar.
Source: /docs/overlays-and-branding.md