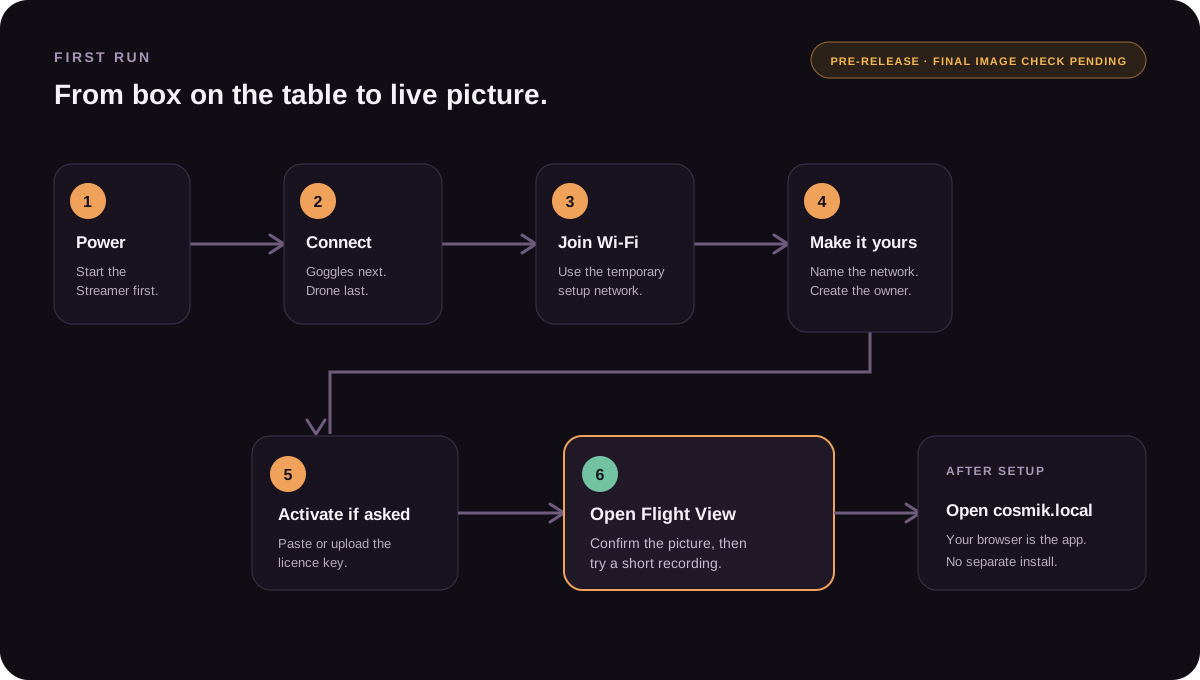
This page is the short operating sequence. If you are assembling the hardware yourself, read Hardware and installation first.
1. Prepare the card
- Download the official Cosmik release image when the release page opens.
- In Raspberry Pi Imager, choose Use Custom, select the image, then select the correct microSD card.
- Let Imager complete both the write and verification.
- Insert the card while the Raspberry Pi is powered off.
2. Connect the hardware
- Connect the goggles to the Pi's USB-C socket with a data-capable cable.
- Connect an optional monitor by micro-HDMI and an optional network cable by Ethernet.
- Connect one release-approved power route: GPIO power or a compatible PoE HAT.
The USB-C socket is carrying goggles data for Cosmik Streamer. It is not the power input in this build.
3. Start in order
- Raspberry Pi first.
- Goggles next.
- Drone last.
4. Finish first setup
The first-run browser screen creates the owner account, the operating Wi-Fi name and password, and the country where the radio will be used. The precise first-contact network instruction will be published only after its legal and customer-image release checks are complete.
After setup, open http://cosmik.local. If that name is already in use on the same
network, try cosmik-2.local, then cosmik-3.local. Those suffixes are
automatic collision names, not permanent unit numbers.
5. Activate the licence
If video is locked, sign in to the Console, open Licence, choose the complete
cosmik-licence.key file, and select Activate video. A new key binds
locally to the first compatible Raspberry Pi where it is accepted. The Pi does not need internet
access for later licence checks.
6. Open Flight View
Open Console → Flight View. The ordinary address remains the guest viewing page; the password-protected Console contains recording, media, output, and settings.
Powering off
Open Console → System and use Power off. It asks once to confirm, then shuts the Streamer down properly so the memory card is never at risk. Give it about ten seconds and then unplug it; the red light staying on simply means power is still connected.
Source: /docs/getting-started.md