Cosmik Streamer is sold as software. You supply and assemble the hardware.
Pre-release boundary: the customer image, minimum microSD capacity, exact power lead, and safe power-off procedure have not completed release testing. This page separates what is settled from what still needs that test. It does not fill gaps with guesses.
The parts
| Part | What is settled | What is not yet final |
|---|---|---|
| Computer | Raspberry Pi 4 Model B. The current project bill of materials specifies 2–4 GB. | No other Raspberry Pi model is supported or promised. |
| Storage | A good-quality A2 microSD card. | The minimum capacity will be published with the completed customer-image test. |
| Goggles cable | A good USB-C data cable between the goggles and the Pi's USB-C socket. | The final supported-cable list has not been published. |
| Power | Power enters through an engineered GPIO supply or a compatible PoE HAT. The current measured target is 5.1–5.2 V at the pins under load and at least 3 A. | The final customer lead, connector, and wire specification are still being measured. |
| Optional display | The Pi has micro-HDMI outputs for a local monitor. | The current software path has been tested on one display output; broader display validation remains open. |
| Optional enclosure | A case and cooling may be added around the finished build. | No case or cooling product has been selected as an official recommendation. |
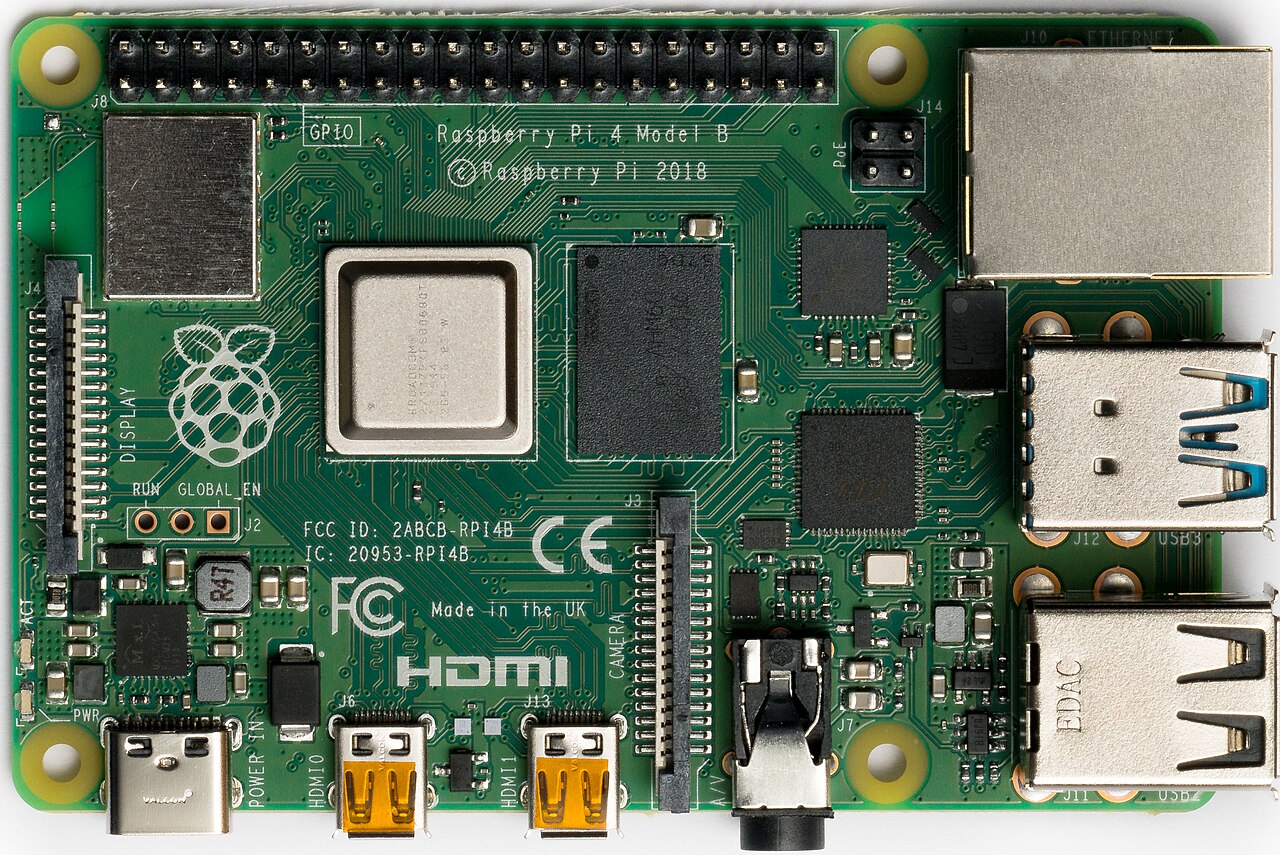
- 140-pin GPIO headerOne supported power route reaches the Pi's 5 V rail through this header. The exact customer lead and pin-level wiring are not release-final, so this is identification rather than a wiring instruction.
- 2USB-C: Goggles 3 dataCosmik uses this socket for the Goggles 3 data connection. It is not the Pi power input in this build.
- 3Two micro-HDMI outputsThe two separate markers identify both smaller display sockets. An optional local display uses one micro-HDMI socket; these are not full-size HDMI.
- 4Gigabit Ethernet jackThis jack carries wired network traffic. With compatible PoE equipment and a compatible PoE HAT, it is also where the PoE cable enters.
- 5Four-pin PoE header (J14)A compatible PoE HAT uses this header together with the 40-pin header. A cable is never connected directly to these four pins.
Do not buy a part solely for Cosmik Streamer until the release list names it. The customer image is not published yet, and the incomplete items above can still affect the final shopping list.
Connect it
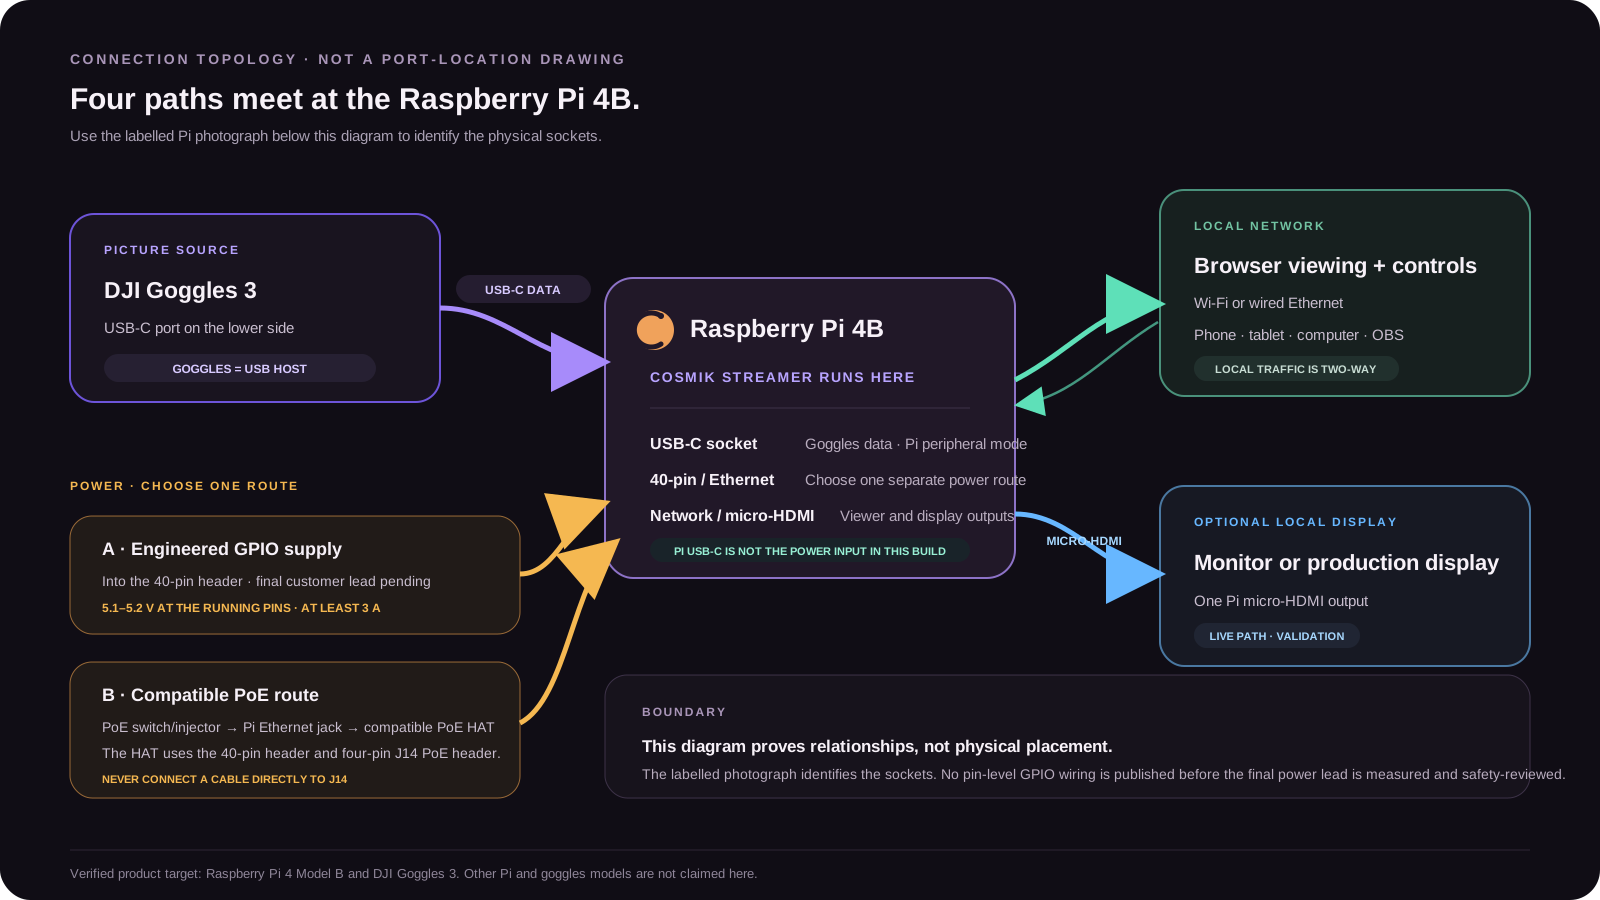
- Keep the Raspberry Pi powered off while inserting the microSD card and attaching cables.
- Connect the goggles to the Pi's USB-C socket with a data-capable cable.
- Connect an optional monitor by micro-HDMI and an optional network cable by Ethernet.
- Connect one approved power route: GPIO power or a compatible PoE HAT.
- Start the Pi first, then the goggles, then the drone.
The Pi's USB-C socket carries the goggles data for this product. It is not the power input in this build.
Prepare the microSD card
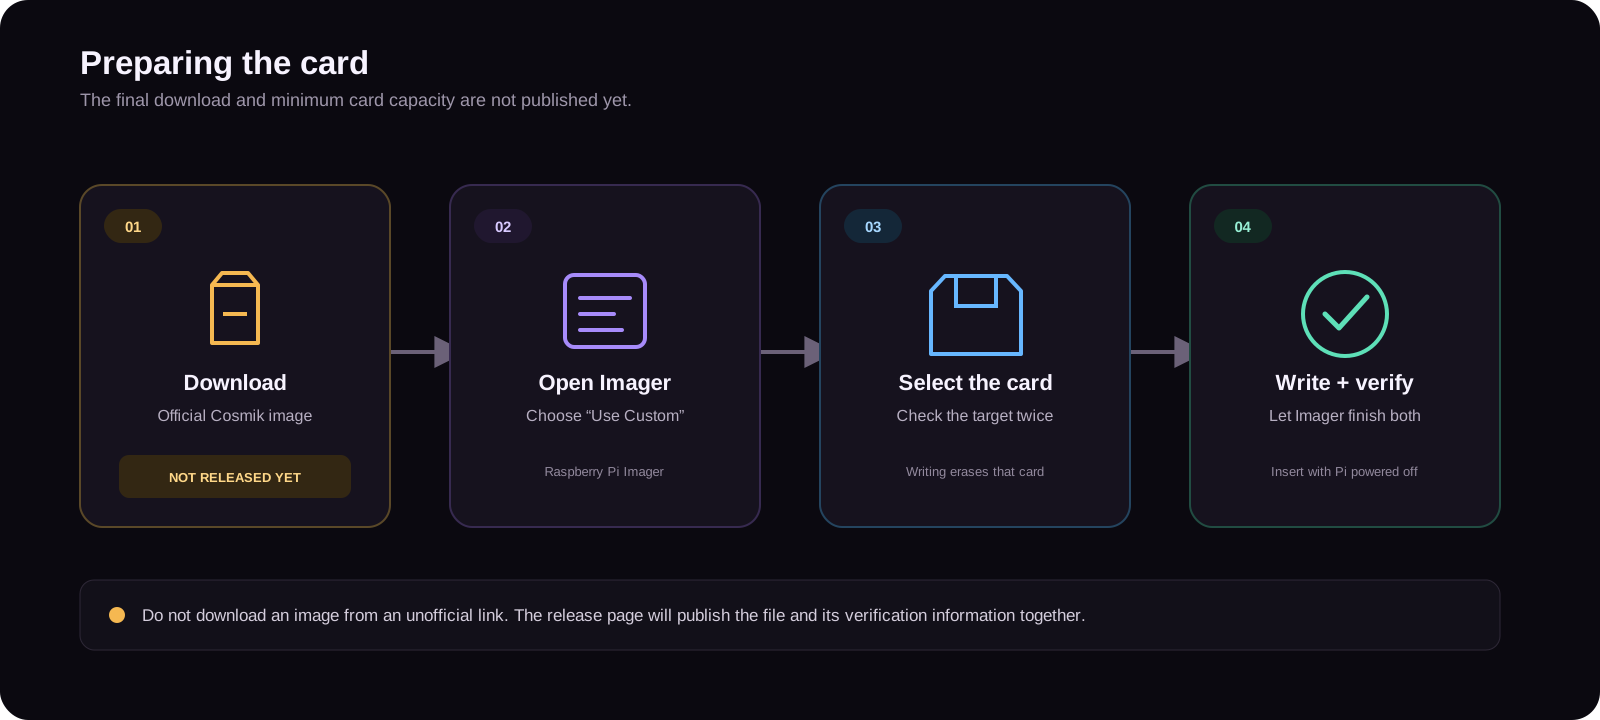
The public Cosmik image is not available yet. When release testing is complete, the download page will provide the image and its verification information together.
The documented write process is:
- Download the official Cosmik release image.
- Open Raspberry Pi Imager.
- Choose Use Custom and select the Cosmik image.
- Select the correct microSD card. Writing erases that card.
- Let Imager finish both the write and verification.
- Remove the card safely and insert it into the powered-off Pi.
Do not substitute an unofficial image or a copied development card. The customer image is built fresh so it contains no developer login, Wi-Fi details, recordings, stream keys, or machine identity.
Open it in a browser
Cosmik Streamer is controlled in a browser. The customer image has no operating-system account and no SSH server.
The exact first-contact Wi-Fi wording is not release-final, so this guide does not publish a password that may change. The first-run screen will require the owner to create an account, choose the operating Wi-Fi name and password, and select the country where the radio will be used.
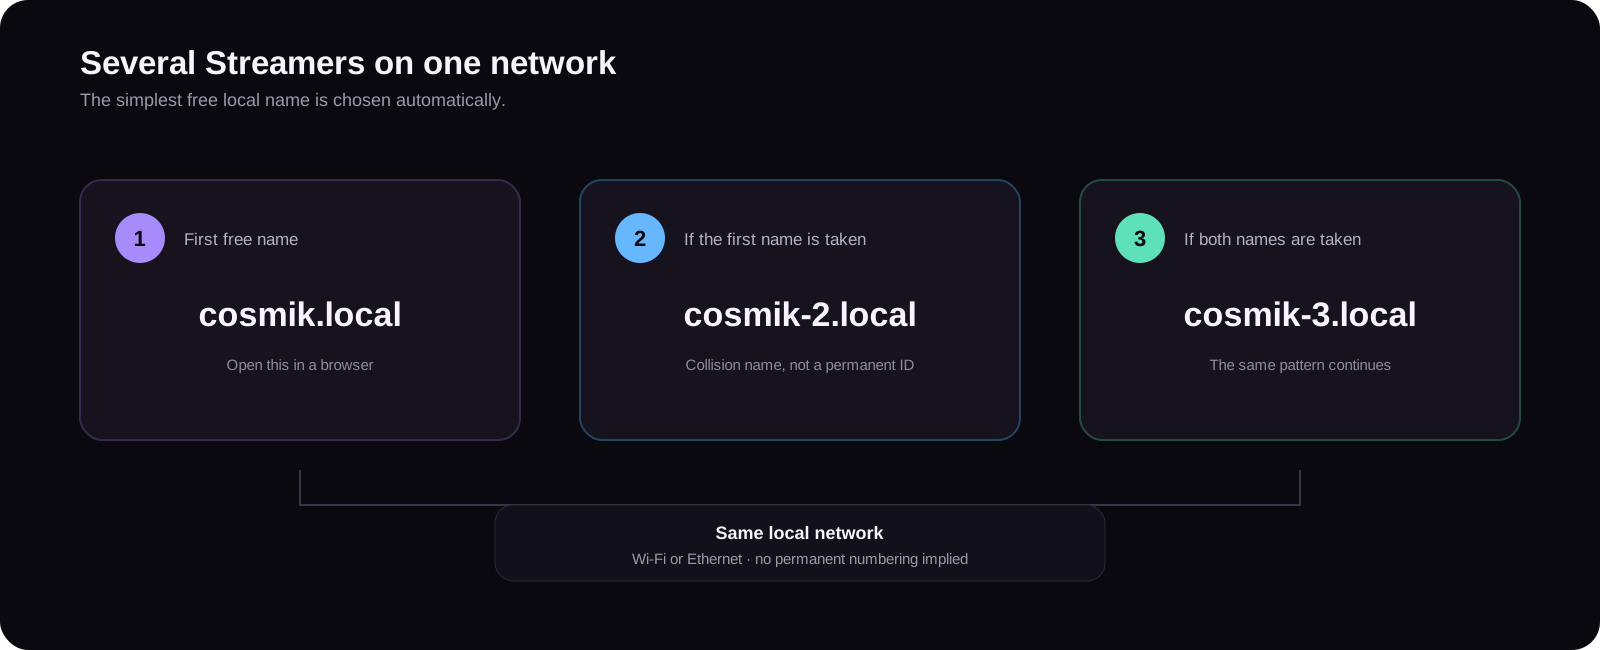
After setup, open:
http://cosmik.localIf another device on the same network already has that name, the next Streamer advertises cosmik-2.local, then cosmik-3.local, and so on. The suffix is created by a name collision; it is not a permanent device number.
Powering off
The current customer-image design has not yet proved that abrupt unplugging is safe for the microSD filesystem. The final release must provide and test a safe power-off method or a filesystem design that tolerates power loss.
Until that release gate is complete, this guide does not tell a customer to simply pull the power.
What the licence does not include
The US$29.99 purchase is one software licence for one compatible Raspberry Pi, including one replacement transfer. The Raspberry Pi, microSD card, power hardware, cables, goggles, drone, enclosure, cooling, network equipment, and displays are not included.
Source: /docs/hardware-and-installation.md